How to Configure the uTorrent Tab Settings
The current version of Media Center Master is 2.14.
Version 1.32 has been used for many the examples in the wiki, so beware that some of the options may be expanded or look different than various screen shots.
Official/Unofficial Wiki Pages Most of the content on the wiki was written by fans and users like yourself. If a page is marked as Official, then the content was written with official information (usually by the software author).
| Media Center Master | |
| A Free Meta-Data and Media Organization Solution |
| Navigation | |
| (Red text indicates your location.) |
| Support Links | |
|---|---|
| Issue Tracker | |
| Forum | |
| Downloads | General |
| Support | Feature Request |
| Bug Report | General Discussion |
| Downloader | Development |
| <<< edit this side bar >>> |
***** Disclaimer -- read this before using Torrent Downloader *****
Step 1 - Leave Media Center Master with the "Setting & Preferences" window open, and do the following:
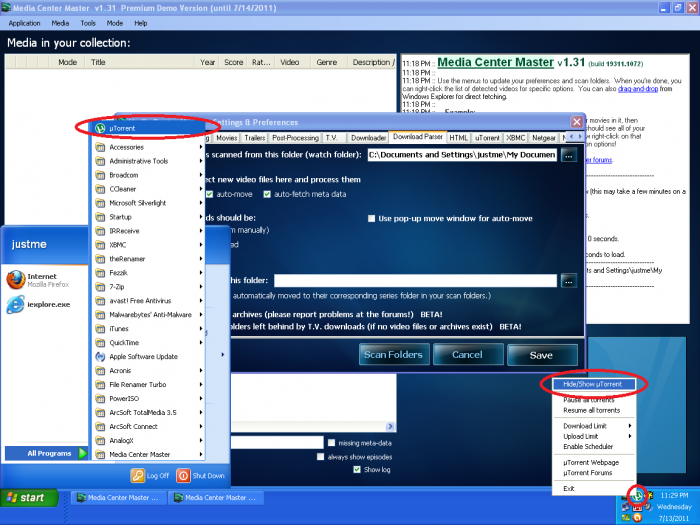
- Open the uTorrent Program through the "Start" button, then "All Programs."
- Right click the uTorrent icon, bottom right of screen, click on "Hide/Show uTorrent" to open uTorrent window.
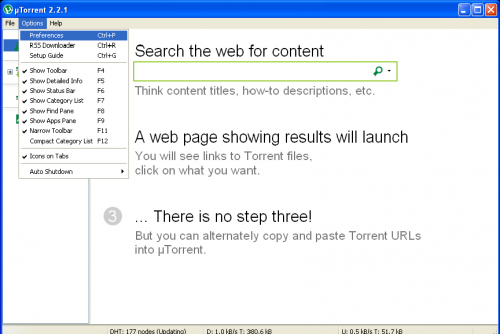
Step 2 - Open the "Preferences" window thru the Options Menu.
Step 3 - With the "Preferences" window open do the following:
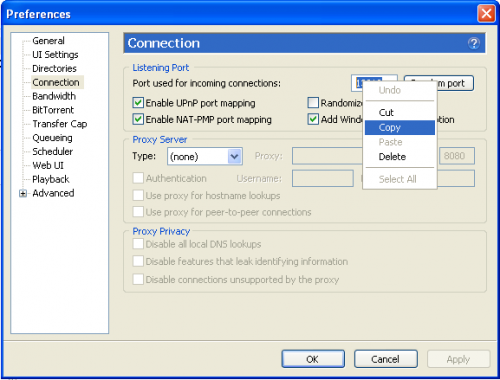
- Click on "Connection" in the list on the left,
- Select and copy the port location listed for "Port used for incoming connections:"
| Specific Information This is the first step in a three (3) part outlined process, to enable, configure, then set the connection for a communication link to Media Center Master and uTorrent for the integration feature.
|
Step 4a - Tick one of the two "Task Bar" buttons for Media Center Master, located at the bottom of your screen, to; Switch back to Media Center Master - "Setting & Preferences" window, leaving uTorrent with the "Preferences" window open, and do the following:
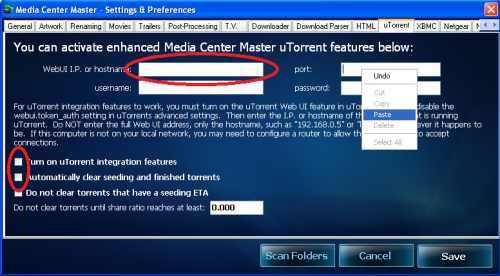
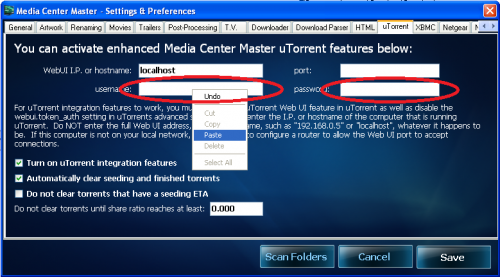
- Change views to the "uTorrent" tab settings,
- Paste the port location from uTorrent into the area for "port:,"
- Enter "localhost" (without quotes) in the area for "WebUI I.P. or hostname:,"
- Tick the check box for "Turn on uTorrent integration features,"
- Tick the check box for "Automatically clear seeding and finished torrents"
Step 4b - Switch back to uTorrent with the "Preferences" window open, leaving Media Center Master - "Setting & Preferences" window open, then choose option #1, or option #2.
- For uTorrent v3.0.0 users, continue to Step 4c.
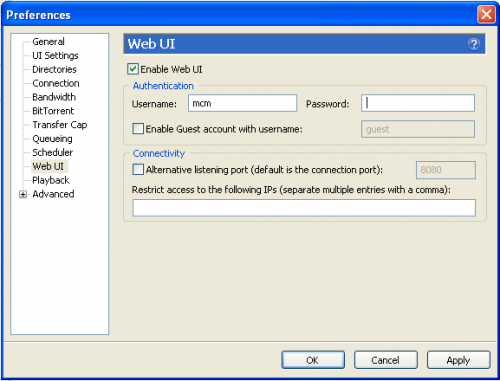
- For uTorrent v1.8 through v2.0 users, select "Web UI" in the list to the left, and continue with the step listed here;
- Select and copy the "Username:,"
- If you remember you password, continue to Step 5,
- If you lost, or forgot your password, re-enter the password, write it down, tick "Apply" to enter it into uTorrents user settings file, then continue to Step 5.
Warning
|
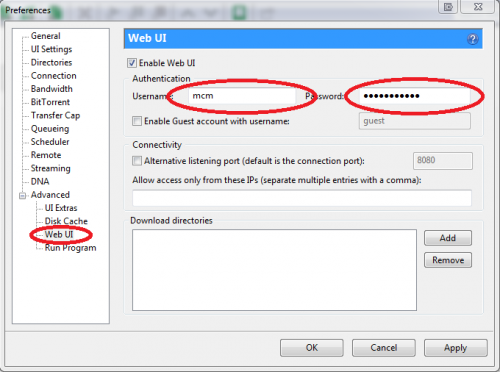
Step 4c - For uTorrent v3.0.0 users, expand the "Advanced" listing in the list to the left, select "Web UI", then do the following:
- Select and copy the "Username:,"
- If you remember you password, continue to Step 5,
- If you lost, or forgot your password, re-enter the password, write it down, tick "Apply" to enter it into uTorrents user settings file, then continue to Step 5.
Warning
|
| Specific Information This is the second step in a three (3) part outlined process, to enable, configure, then set the connection for a communication link to Media Center Master and uTorrent for the integration feature.
|
Step 5 - Switch back to Media Center Master - "Setting & Preferences" window, leaving uTorrent with the "Preferences" window open, and do the following:
- Paste the Username into "username:" input field,
- Type the Password into the "password: input field,
- Click the "Save" button to close the "Setting & Preferences" window.
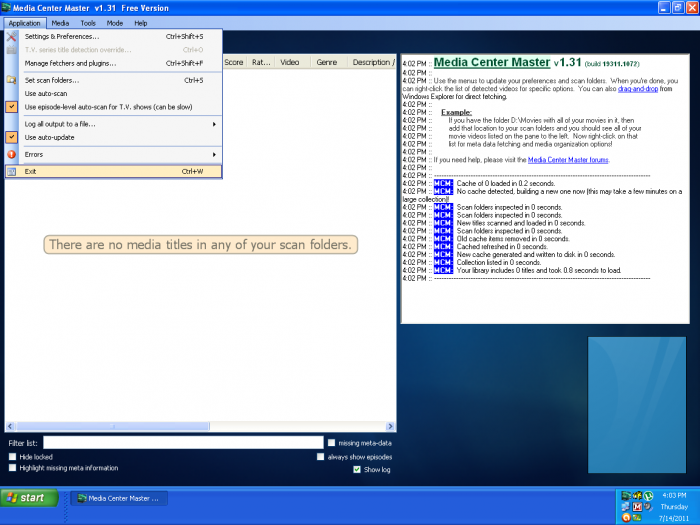
Step 6 - Exit Media Center Master through the "Application" menu.


